Quick Links Visit the Azure Free Account Signup Unity Catalog Account Creation Process How to Connect Azure SQL Database Once you’ve created …
Azure Storage Account is used to store data in Azure. They support blobs, files, queues, and tables.
In this guide, you’ll learn how to create a storage account using the Azure portal.
We’ll walk through every step, from choosing a resource group to enabling data protection.
An active Azure subscription
Contributor or Owner role access in the selected resource group
Basic understanding of resource groups and regions
Go to: https://portal.azure.com
Sign in using your Microsoft or organizational account.
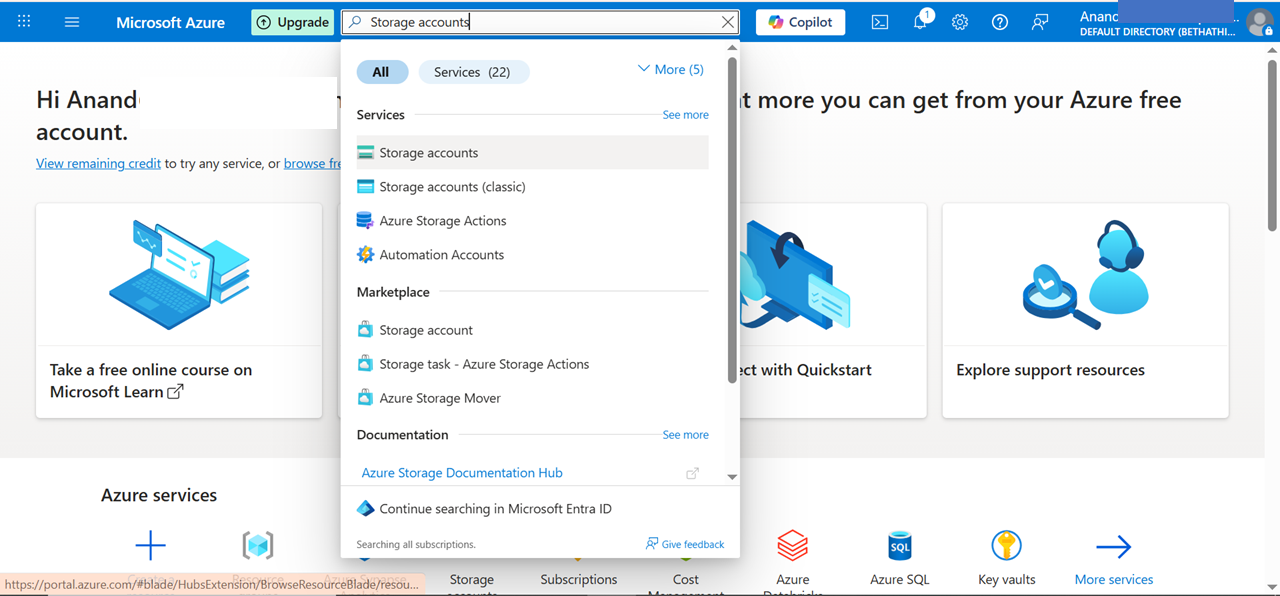
In the search bar at the top, type “Storage Accounts” and click on the service from the results.

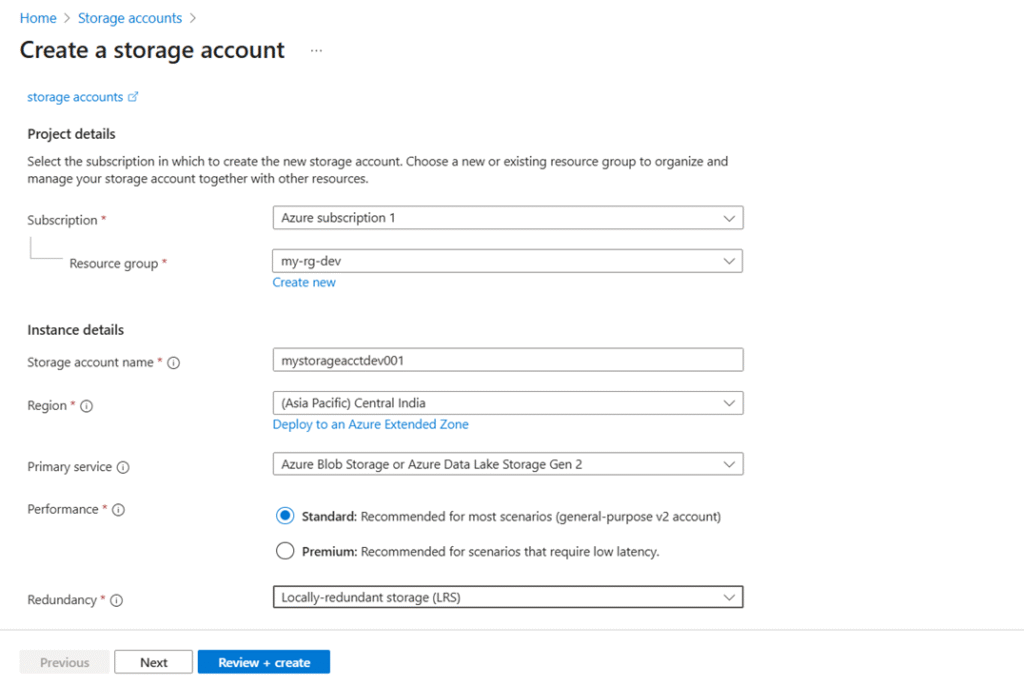
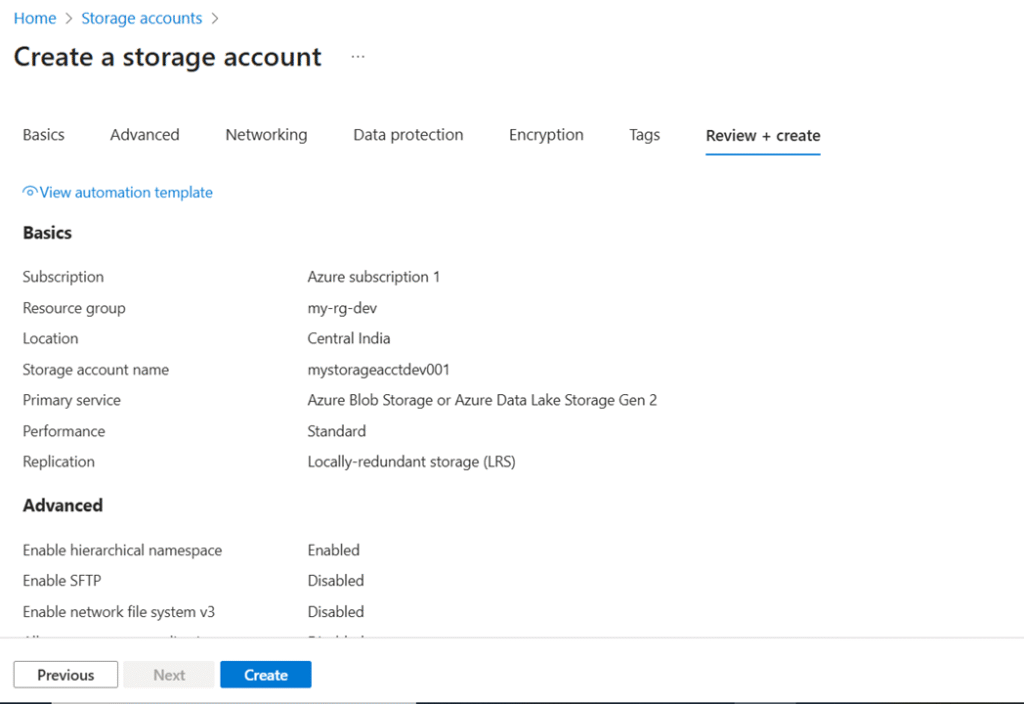
Subscription: Choose your Azure subscription.
Resource Group: Select an existing group or click Create new.
Storage Account Name: Use a unique name which contains lowercase letters and numbers only.
🔹 Example: simpleguruazstorage
Region: Choose the region closest to your users.
Performance: Choose Standard unless you need high-performance SSDs.
Redundancy: Select one of the replication options like LRS, GRS, or ZRS.

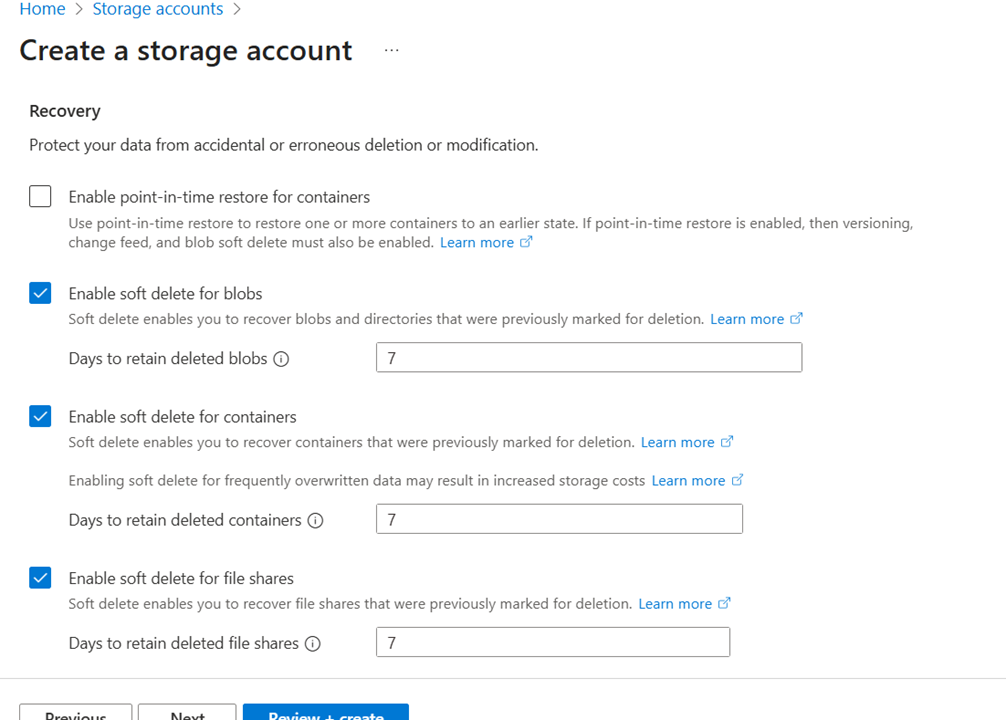
In the Data Protection tab:
Enable soft delete for blobs and containers.
Turn on versioning if you want historical versions.
Configure tracking and recovery options.
Environment: Dev, Owner: TeamA).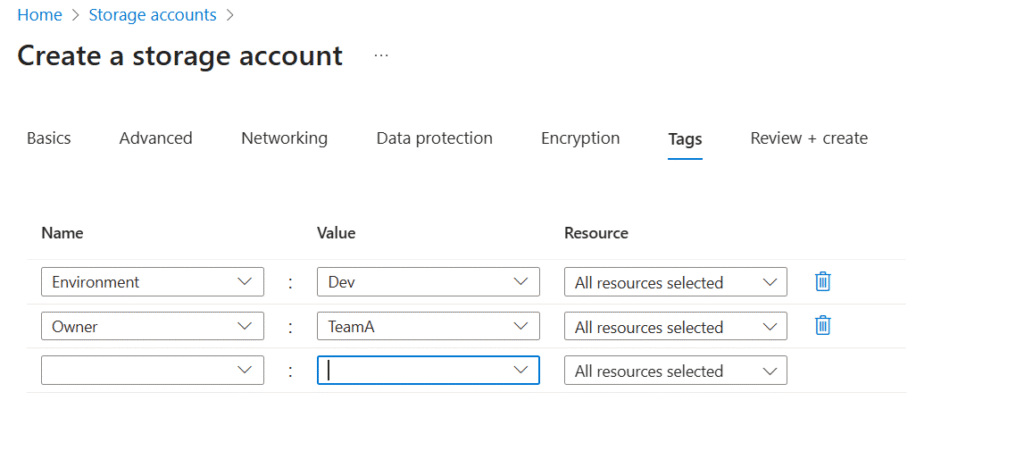
To summarize, Azure Storage Accounts provide the core for managing scalable, durable cloud storage.
By following the above steps, you can create an Azure Storage Account with ease.
In the future, this storage can power data lakes, applications, or blob storage.
So, whether you’re a beginner or an experienced cloud user, setting up Azure Storage is a must-have skill.
Quick Links Visit the Azure Free Account Signup Unity Catalog Account Creation Process How to Connect Azure SQL Database Once you’ve created …
Quick Links Visit the Azure Free Account Signup Unity Catalog Account Creation Process How to Setup Azure SQL Database – Step-by-Step Guide …
Quick Links Visit the Azure Free Account Signup Unity Catalog Account Creation Process Step 1: Visit the Azure Free Account Signup Page …
Quick Links Visit the Azure Free Account Signup Unity Catalog Account Creation Process How to Setup Unity Catalog Account – Step-by-Step Guide …
Quick Links Visit the Azure Free Account Signup Unity Catalog Account Creation Process How to Create a Free Azure Account – Step-by-Step …

Simple Guru IT Training Academy is an educational institution that provides specialized training in Information Technology (IT).
Copyright 2025© Simple Guru | Designed by Web Rocz
WhatsApp us