Quick Links Visit the Azure Free Account Signup Unity Catalog Account Creation Process How to Connect Azure SQL Database Once you’ve created …
An Azure Resource Group is a container that holds related resources for your Azure solution. It helps in organizing, managing, and monitoring costs and access controls effectively.
Whether you’re setting up virtual machines, storage, databases, or web apps—resource groups are your first building block in Azure.
📌 Follow this easy guide to create your first resource group in Azure Portal in under 2 minutes.
Step-by-Step Instructions to Create an Azure Resource Group
Go to: https://portal.azure.com
Sign in using your Microsoft or organizational account.
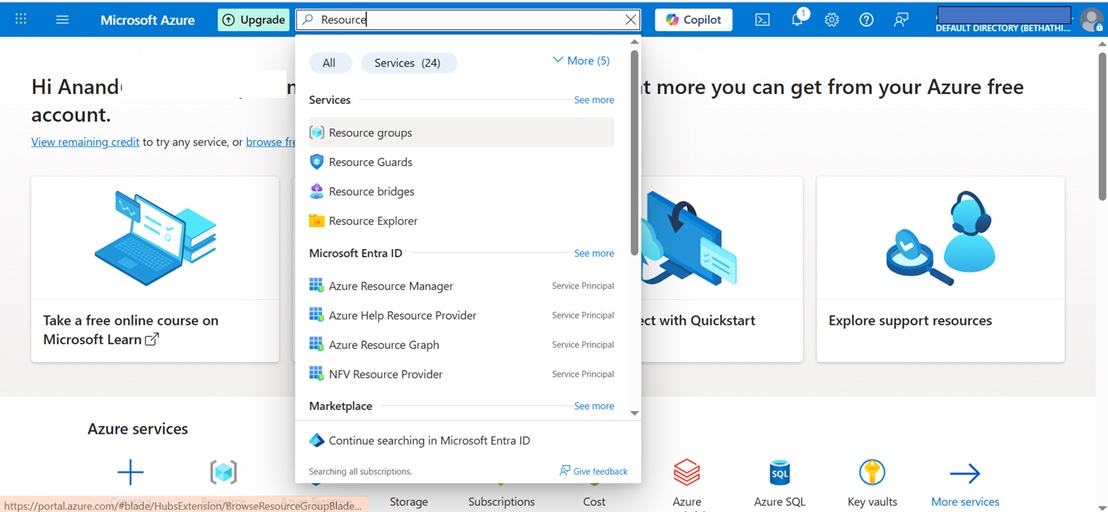
In the top search bar, type Resource Groups.
Click on the “Resource Groups” option that appears.


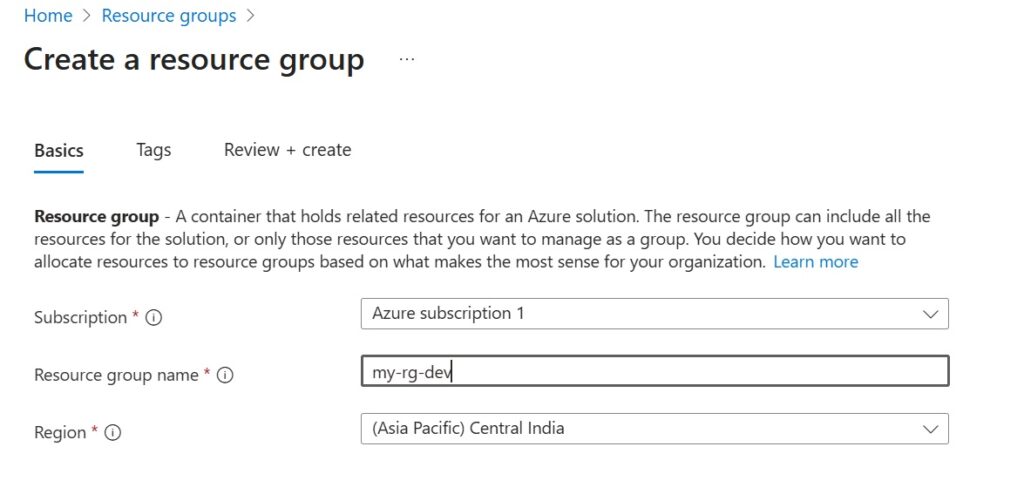
Subscription: Choose your subscription (e.g., Free Trial, Pay-As-You-Go).
Resource Group Name: Enter a unique name (e.g., my-rg-dev).
Region: Select the desired Azure region (e.g., East US, West Europe).

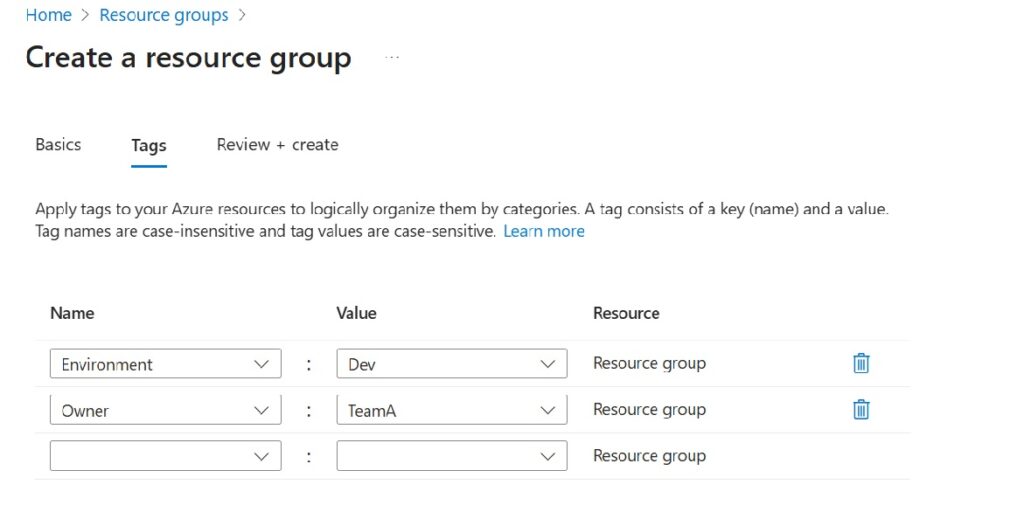
Environment: Dev, Owner: TeamA).
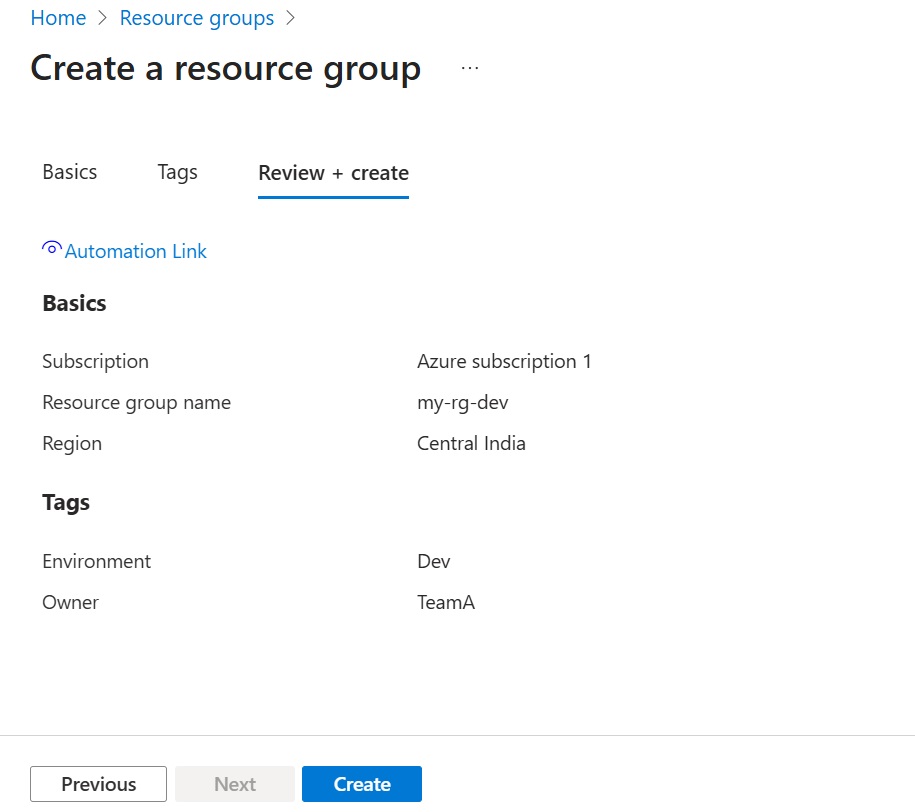
Click Review + Create.
Validate all entries and then click Create.

You’ve now created your first Azure Resource Group. You can begin deploying Azure services inside this group immediately.
Quick Links Visit the Azure Free Account Signup Unity Catalog Account Creation Process How to Connect Azure SQL Database Once you’ve created …
Quick Links Visit the Azure Free Account Signup Unity Catalog Account Creation Process How to Setup Azure SQL Database – Step-by-Step Guide …
Quick Links Visit the Azure Free Account Signup Unity Catalog Account Creation Process Step 1: Visit the Azure Free Account Signup Page …
Quick Links Visit the Azure Free Account Signup Unity Catalog Account Creation Process How to Setup Unity Catalog Account – Step-by-Step Guide …
Quick Links Visit the Azure Free Account Signup Unity Catalog Account Creation Process How to Create a Free Azure Account – Step-by-Step …

Simple Guru IT Training Academy is an educational institution that provides specialized training in Information Technology (IT).
Copyright 2025© Simple Guru | Designed by Web Rocz
WhatsApp us