Quick Links Visit the Azure Free Account Signup Unity Catalog Account Creation Process How to Connect Azure SQL Database Once you’ve created …
Azure Data Factory (ADF) is a powerful cloud-based ETL service. It allows you to integrate data from various sources, making it easier to support analytics and business intelligence. In this guide, you will learn how to create Azure Data Factory using the Azure Portal. The steps are easy to follow, with clear screenshots and helpful tips. Whether you’re just getting started or need a refresher, this tutorial will help you get the job done quickly and easily.
Before you start, make sure you have the following:
An active Azure subscription
Access to the Azure Portal
A Resource Group created
Go to: https://portal.azure.com
Sign in using your Microsoft or organizational account.
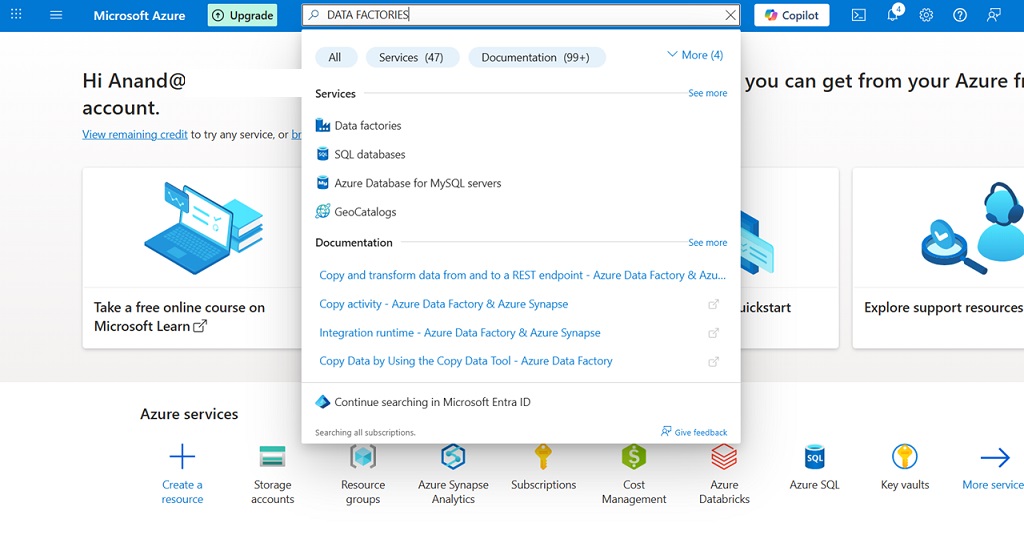
In the top search bar, type Data Factory.
Then, click on the Data Factory option that appears in the list.

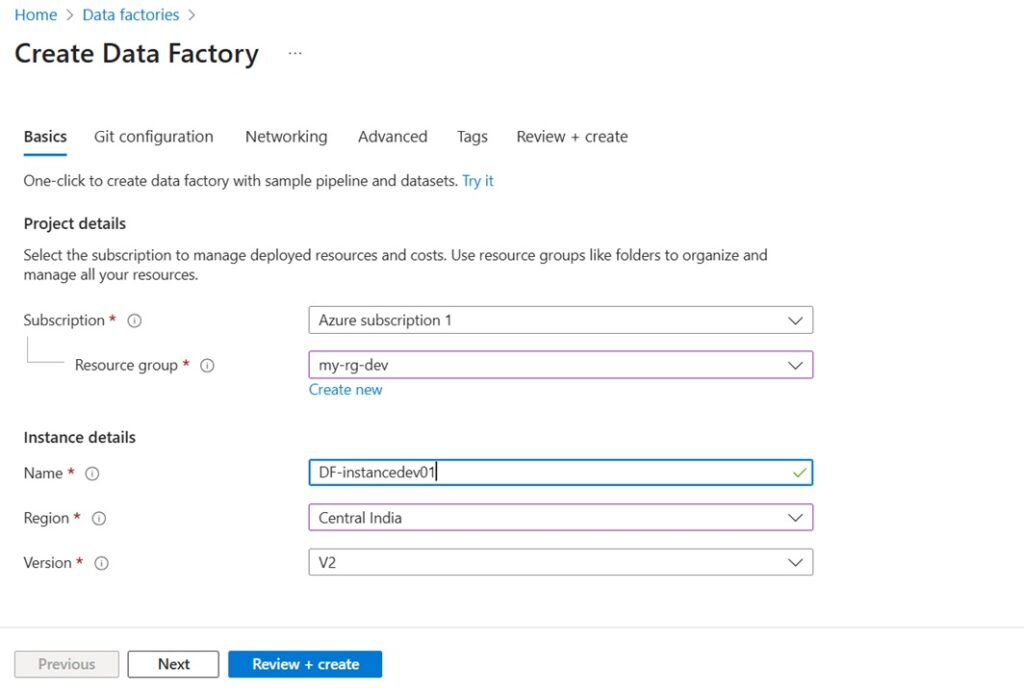
Now, configure the basic details:
Subscription: Choose your subscription (e.g., Free Trial or Pay-As-You-Go).
Resource Group: Select an existing group or create a new one.
Region: Pick your preferred Azure region (e.g., East US, West Europe).
Name: Type a unique name for your instance (e.g., MyADFInstance).
This step covers everything you need to get started.
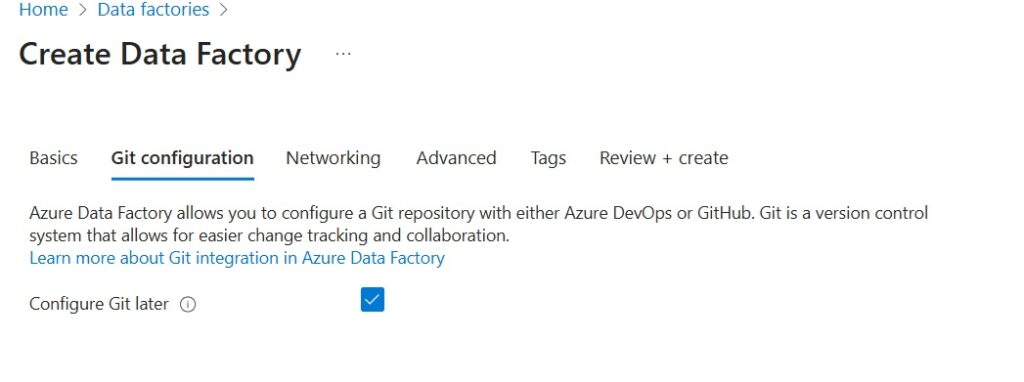
You may choose to link your Data Factory to Git. If not, select Configure Later.
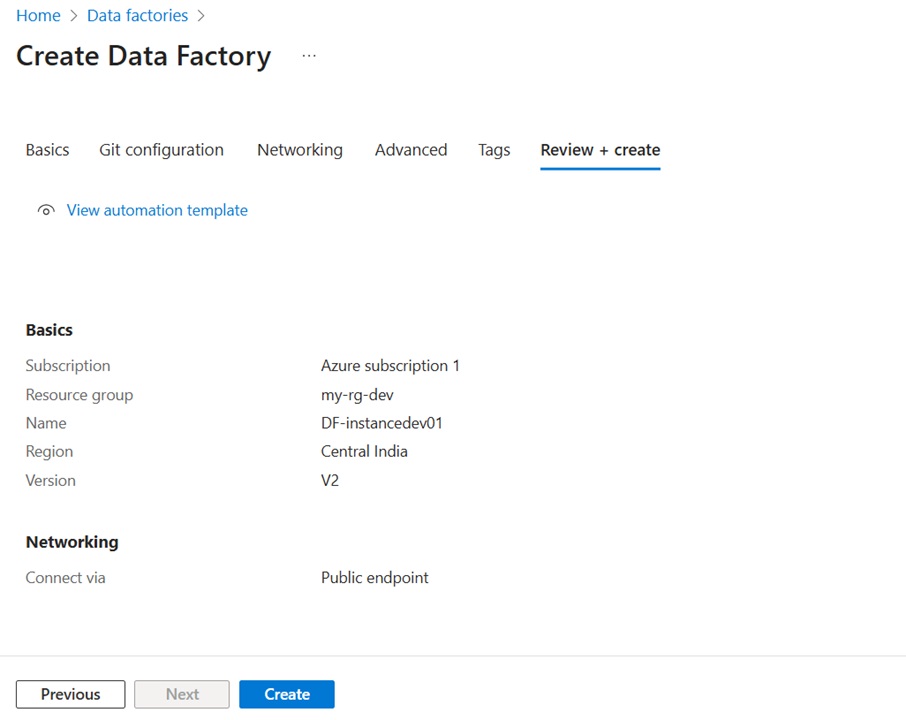
Click Review + Create.
Check the details you entered. Then, click Create.
Once deployed, click Go to Resource.
Then click Open Azure Data Factory Studio
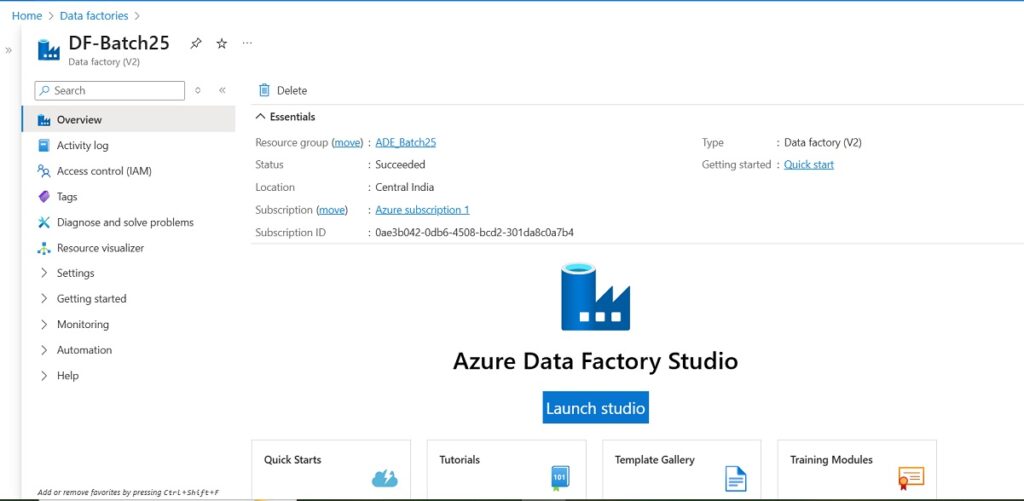
To sum up, creating an Azure Data Factory account is a quick and simple process. With this step-by-step guide, you’ve learned the exact actions to take. Moreover, you now have access to the tools needed to start building pipelines and managing your data. With Azure Data Factory, your journey into data integration and automation has truly begun.
Quick Links Visit the Azure Free Account Signup Unity Catalog Account Creation Process How to Connect Azure SQL Database Once you’ve created …
Quick Links Visit the Azure Free Account Signup Unity Catalog Account Creation Process How to Setup Azure SQL Database – Step-by-Step Guide …
Quick Links Visit the Azure Free Account Signup Unity Catalog Account Creation Process Step 1: Visit the Azure Free Account Signup Page …
Quick Links Visit the Azure Free Account Signup Unity Catalog Account Creation Process How to Setup Unity Catalog Account – Step-by-Step Guide …
Quick Links Visit the Azure Free Account Signup Unity Catalog Account Creation Process How to Create a Free Azure Account – Step-by-Step …

Simple Guru IT Training Academy is an educational institution that provides specialized training in Information Technology (IT).
Copyright 2025© Simple Guru | Designed by Web Rocz
WhatsApp us